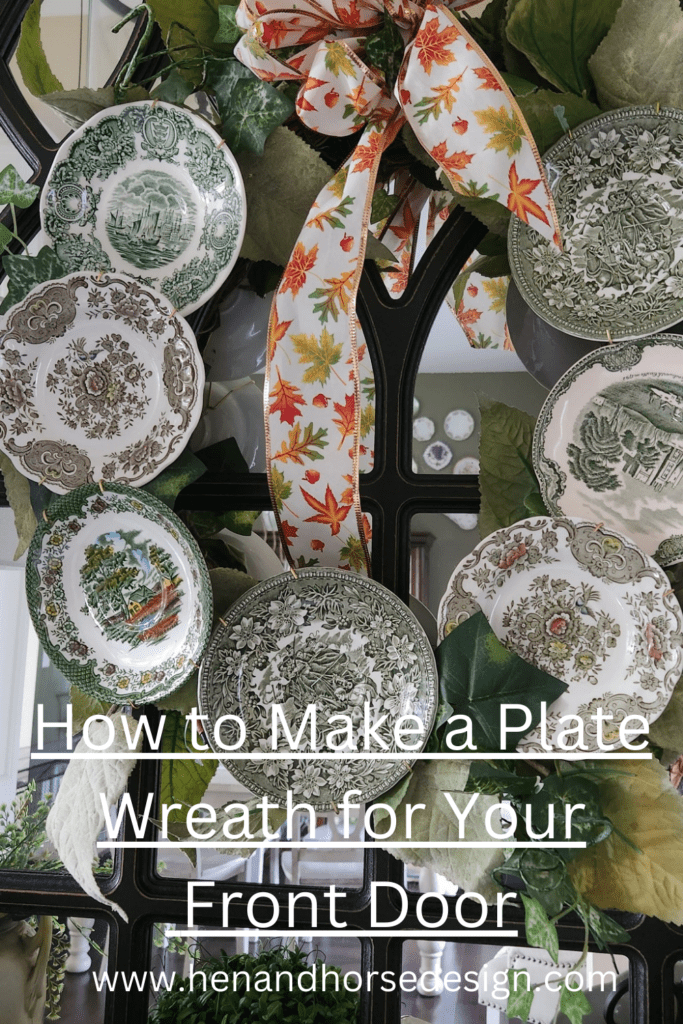
How to Make a Plate Wreath for Your Front Door
How to Make a Plate Wreath for Your Front Door! Add some festive flair to your front door with this easy-to-follow tutorial!
It’s time to start thinking about sprucing up your home for the changing season. One of the easiest ways to do that is by hanging a wreath on your front door.
But store-bought wreaths can be expensive, and you probably want something a little more unique this holiday season. Am I right? Plus, I love being able to use what I have before heading out to purchase something else. Are you with me on this?
Unlock Your Creativity: How to Make a Plate Wreath
Today I’m going to share with you how much fun is to make one for yourself. This vintage plate wreath project is simple, relatively inexpensive, and best of all, you can customize it however you like!
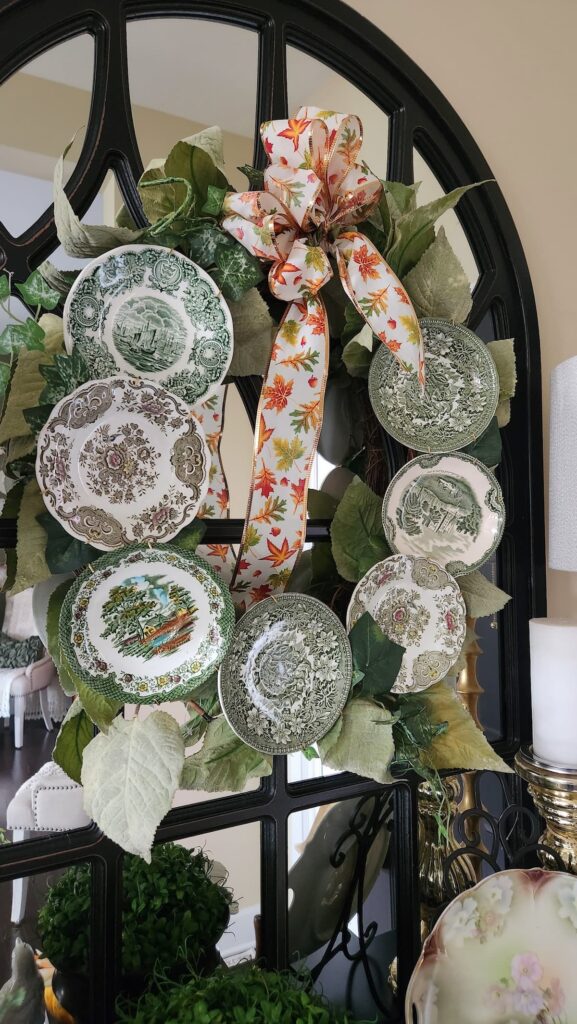
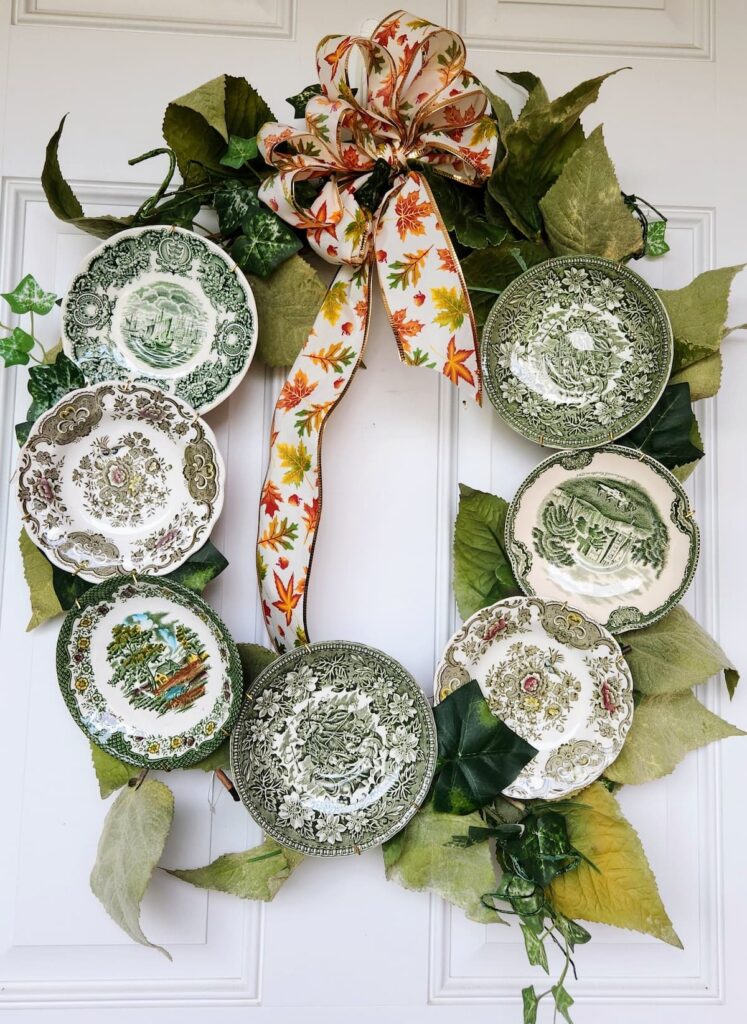
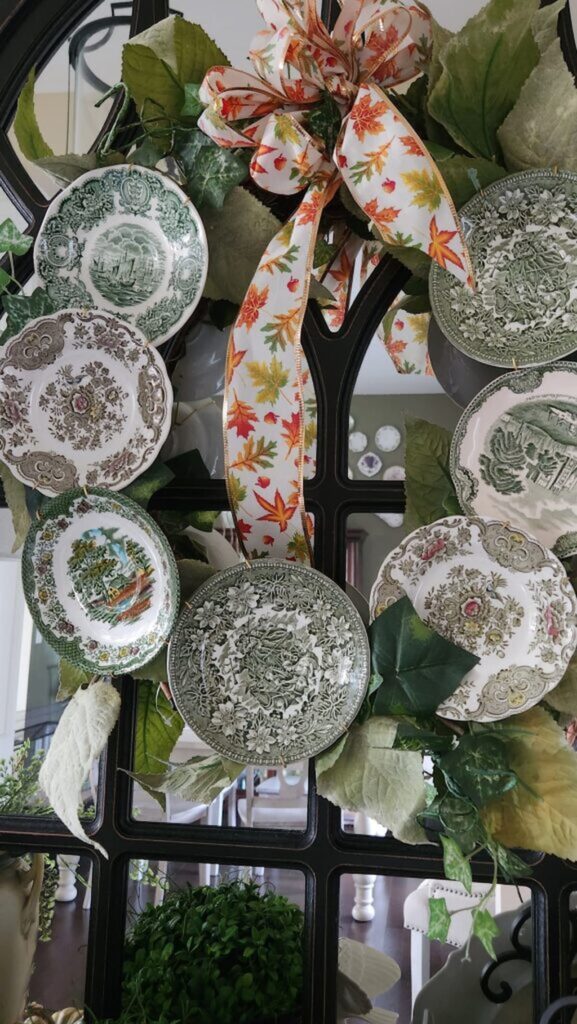
I already had a grapevine wreath on hand, so I decided to make a plate wreath using tea cup saucers and the grapevine wreath for my front door.
Step-by-Step Guide on Creating a Stunning Plate Wreath – Transform Your Entryway with Our How-To Tips
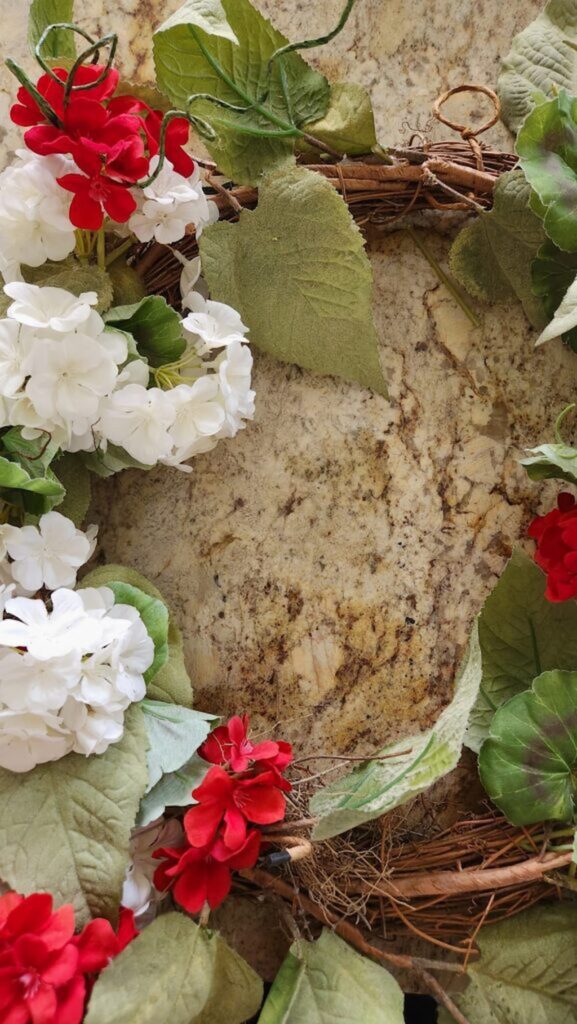
Rather than buy a new grapevine wreath, last year I got busy with a fun project and made a wreath with red and white flowers.
Gather Your Materials and Tools for the Perfect Plate Wreath Creation
Basic Supplies You Will Need:
- A grapevine wreath or wire wreath form (you can find these at most craft stores)
- 8-10 tea cup saucers (a great way to source teacups and saucers are at thrift stores or estate sales)
- wire plate hangers
- wire wreath
- floral wire
- wire cutters
- vintage plates
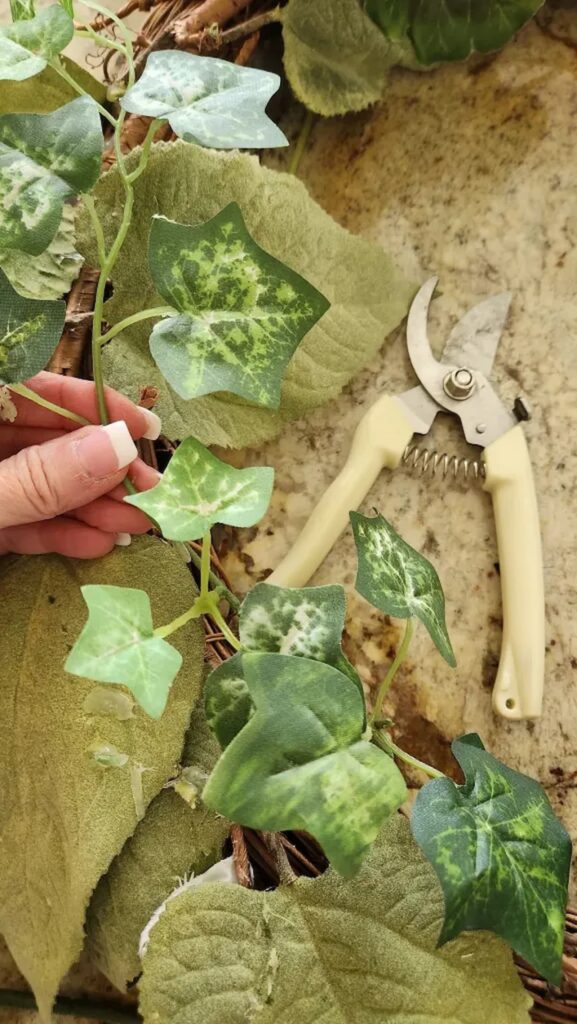
- Faux greenery may be purchased at any craft store
- hot glue gun
- Glue sticks
- Optional: ribbon, fake leaves or flowers, etc. for decoration
Crafting Delightful Plate Wreaths: A Step-by-Step Guide
1. Gather Your Supplies:
Collect vintage dishes, a grapevine wreath, floral wire, wire cutters, and any additional decorative elements such as ribbon or faux flowers.
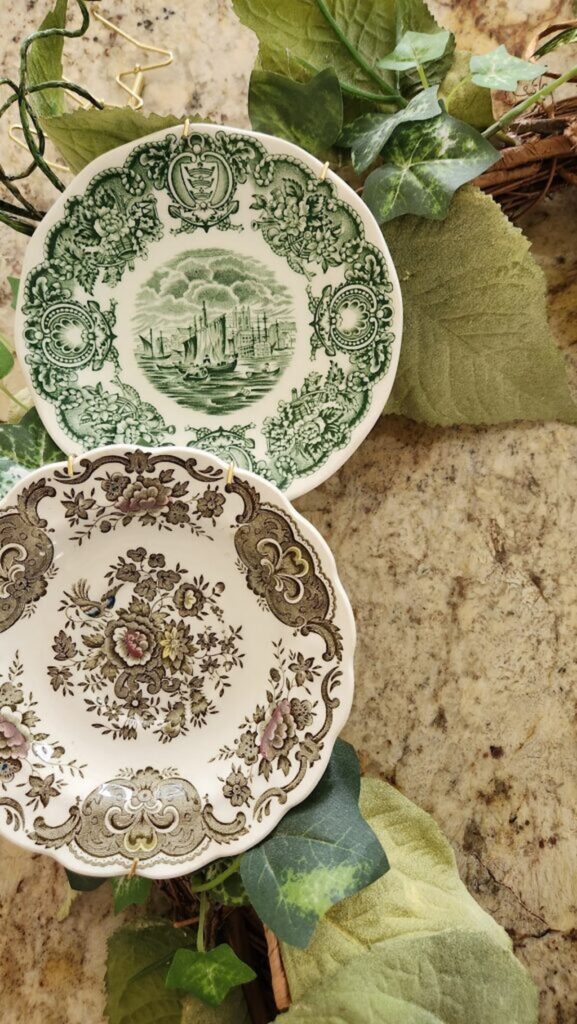
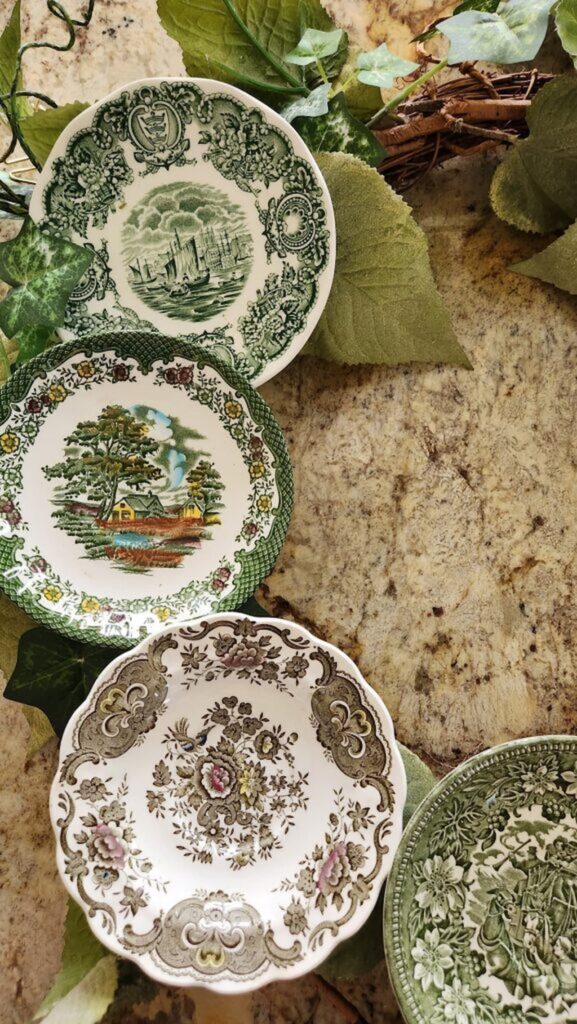
2. Choose Your Vintage Dishes:
Select different sizes of vintage dishes in different sizes, colors, and patterns. Ensure they complement each other for a cohesive and charming look.
Once I had the flowers removed, I added fresh greenery to the top of the grapevine wreath to give it a brighter look.
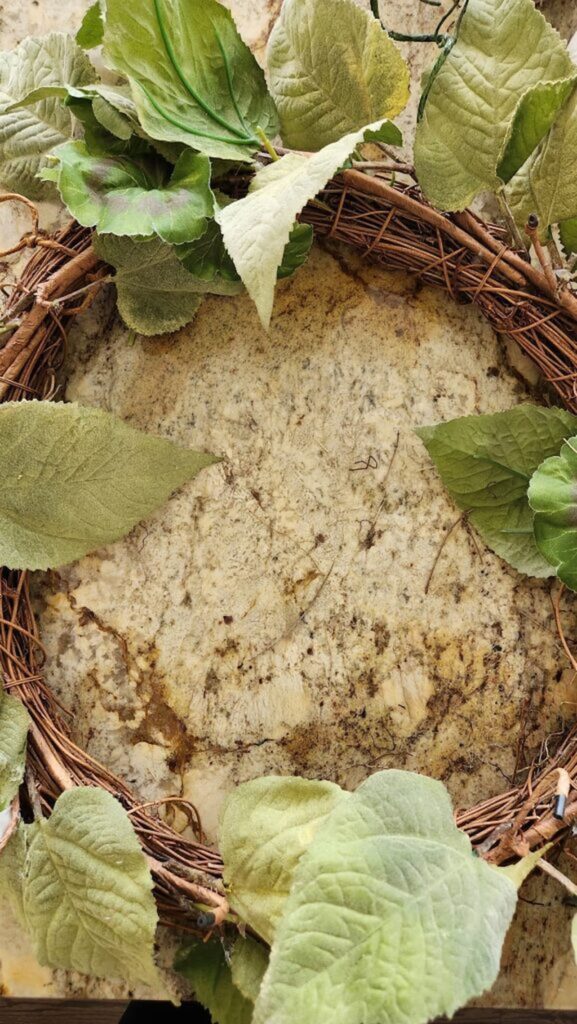
3. Prepare the Grapevine Wreath:
Lay out your grapevine wreath and inspect it for any loose or protruding vines. Trim or secure them using floral wire to create a stable base.
4. Arrange the Vintage Dishes:
Experiment with different arrangements of your vintage dishes on the wreath base until you find a pleasing design. Consider placing larger dishes at the bottom and smaller ones towards the top.
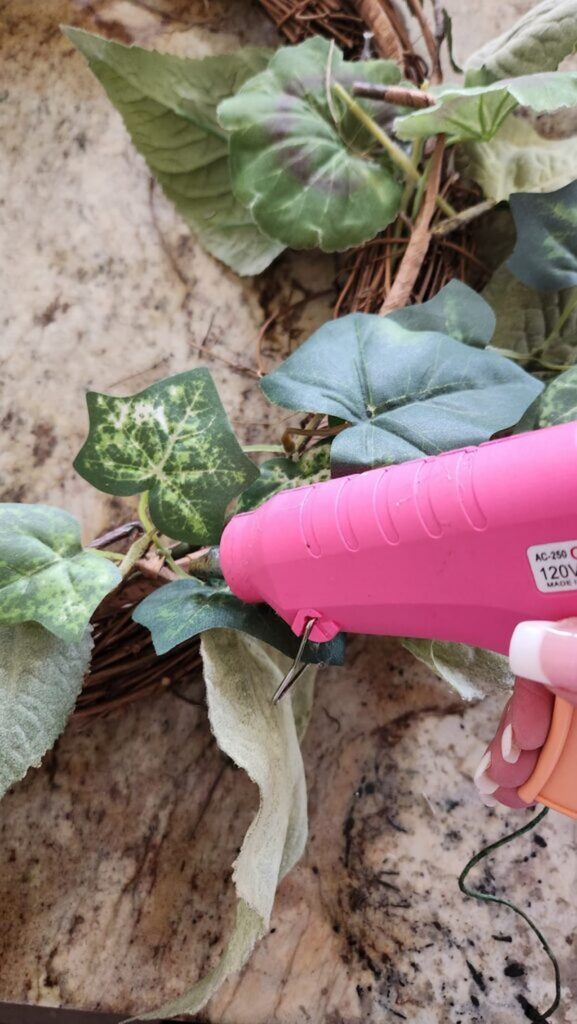
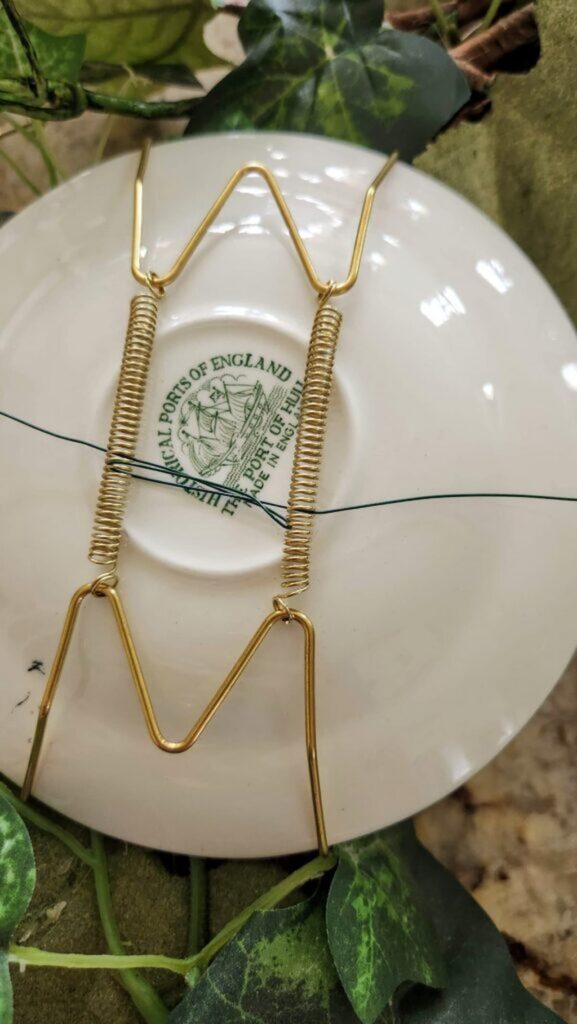
5. Secure the Dishes with the Plate Hangers or Floral Wire:
Using the right size hangers or floral wire, attach each vintage dish securely to the grapevine wreath. Wrap the wire around the back of the plate and attach it to the wreath, ensuring a tight hold without damaging the dishes. Tuck in the ends of the wire.
6. Create a Balanced Composition:
Pay attention to the overall look and balance of the wreath. Aim for symmetry or a visually appealing asymmetry, making adjustments as needed to accommodate the weight of the plates.
7. Add Decorative Accents:
7. Add Decorative Accents: Integrate additional decorative elements such as holly berries, silk flowers, a piece of ribbon or bow, or other vintage-inspired embellishments. Attach them strategically to enhance the overall aesthetic.
8. Check Stability:
Ensure that all of your precious plates are securely attached to the wreath. Gently shake the wreath to test its stability and make any necessary adjustments.
9. Secure Hanging Mechanism:
The last step is to attach a sturdy hanging mechanism, such as a wire loop or ribbon, to the back of the wreath. This will allow you to hang it securely on your front door or in your dining room.
10. Hang and Enjoy:
My favorite part! Find the perfect spot on your front door for this easy project. Secure the wreath in place, and step back to admire your beautiful vintage plate wreath. Sharing your creation proudly with friends and family is the best part!
Not crafty? I’ve got you covered.
Not crafty? That’s okay. These gorgeous wreaths can be delivered right to your front door from Amazon.
The next time you consider making an easy craft project, consider the charm of making a hanging plate wreath using vintage mismatched plates. It’s a fun magical way of creating something from nothing. If you don’t have unused vintage plates, a quick visit to Dollar Tree will help turn an old worn wreath from last season into a whole new canvas for your decor.

Transforming it into a great project becomes a joyous exploration of easy DIY projects that elevate your Christmas decorations to new heights. The mishmash of vintage plates adds a touch of nostalgia and uniqueness, making your creation a standout piece.
Happy Crafting!
Shop & Source

Other wreath DIYs you may enjoy:
Bright and Cheery Christmas Ornament Wreath
Easy Pinecone Wreath for Any Season
Herb Wreath Made with Fresh Rosemary
Pumpkin Wreath with Wire Frame


Oh my goodness! I love this so much. I’m definitely going to have to make one. I love the selection of platees that you used so pretty. I’m going to have a hard time focusing on what I am supposed to be doing today. Hugs to you.
thank you Renae! Yes, you should! Tag me, I’d love to see. (these are the plates I brought home from our Round Top trip)
I just love this Susan, such a cute idea and I love all of the transfer ware plates. The perfect fall wreath.
thank you Wendy! These are the plates from Round Top. Half of them didn’t break it!
You did a beautiful job with this wreath, Susan. I love the pretty green dishes! Love it! ~Missy
I’m a big fan of transferware and love this idea! Thanks for sharing!