How to Make An Easy Easter Egg Tree
Easter is right around the corner! Are you getting ready? I’m excited to share with you today How to Make an Easy Easter Egg Tree!
Growing up holidays in our home were filled with traditions and rich memories. It wasn’t just for Easter, but for every holiday, our family would gather around the table for hours eating delicious meals and sharing stories of years past. Having a beautiful table was something my mom always enjoyed getting ready.
As I have mentioned before, one large part of our traditions was a well-set table. My mom took such pride in sharing her beautiful tablescapes. She also enjoyed having the table be ‘filled with family’, and the ‘driveway full of cars’, as she would say! ! I love that I’ve inherited her love of creating.
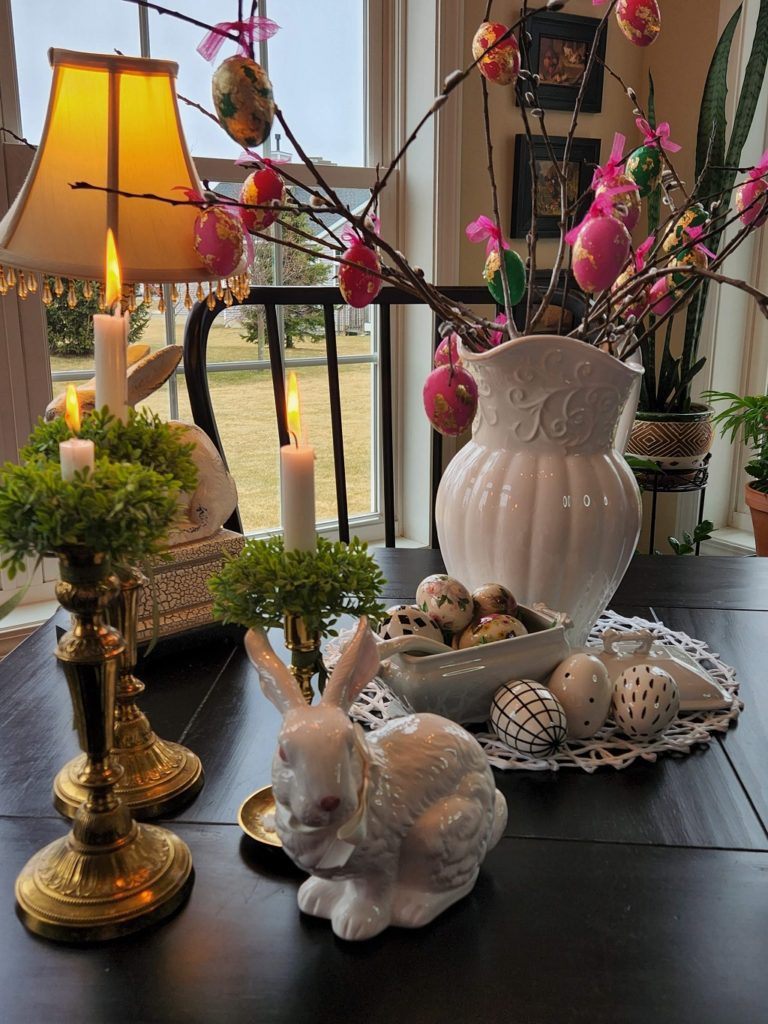
One great way to get ready for Easter is to have an Easter Egg Tree. Whether it is inside or out, nothing says Happy Easter more than an egg tree!
What is the Meaning of an Easter Egg Tree?
Easter Egg Trees have been around for centuries. The symbolism of eggs is new life! Whether your eggs are hung on a tree outside, or on branches inside, it’s a beautiful way to acknowledge the new life that Spring brings!
How to Make A Easter Egg Tree?
Easter Egg Trees are really simple to create and the best part is they won’t cost you a bundle.
Supplies you will need
- 1 to 2 dozen eggs (I used two bags from Michael’s)
- Any color paint
- Several brushes – one for each colorSponge – adhering adhesive
- Gold Foil Sheets
- Ribbon
- Glue Gun
- Scissors
- Branches – Any outdoor branches will do (no need to buy any)
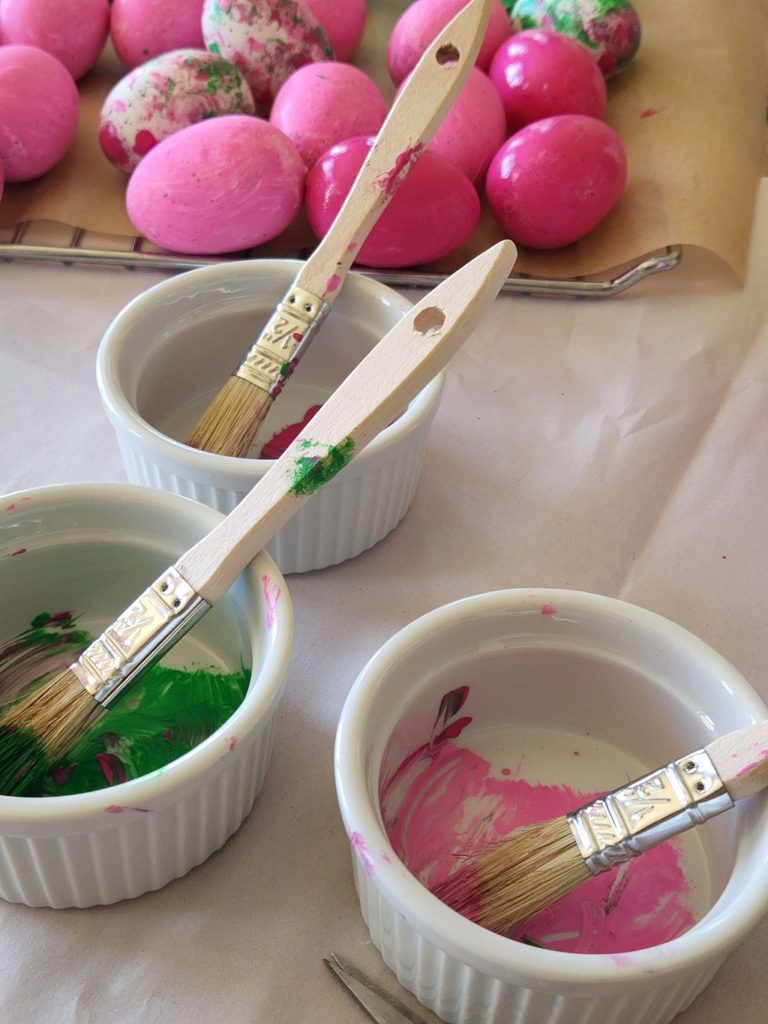
For my eggs, I used acrylic paints. For several eggs, I used my finger to paint them! Be creative. There is no wrong way to be creative.
If you like, that is all that matters!

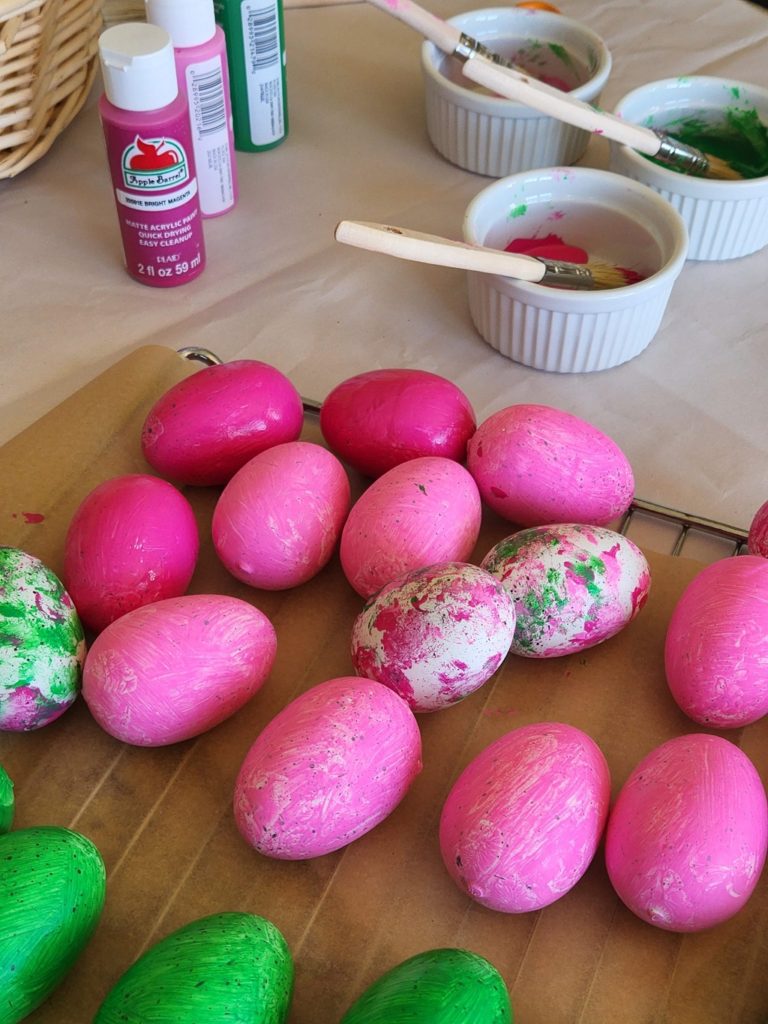
My color options were pink, dark pink, and green to coordinate with my Easter Table setting. (I’ll be sharing that with you soon)
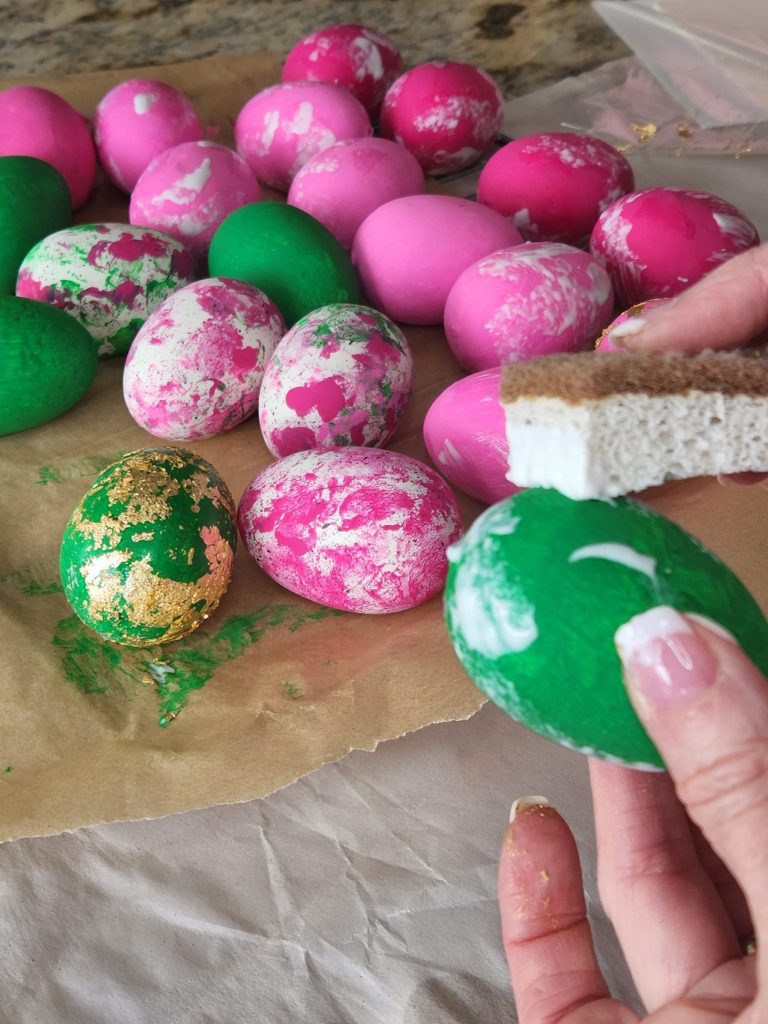
Once the paint dried, I used my sponge to dab the adhesive into each egg.
Wait about 20 minutes for the adhesive to get tacky, then fold a gold foil sheet around each egg, brushing off the excess.
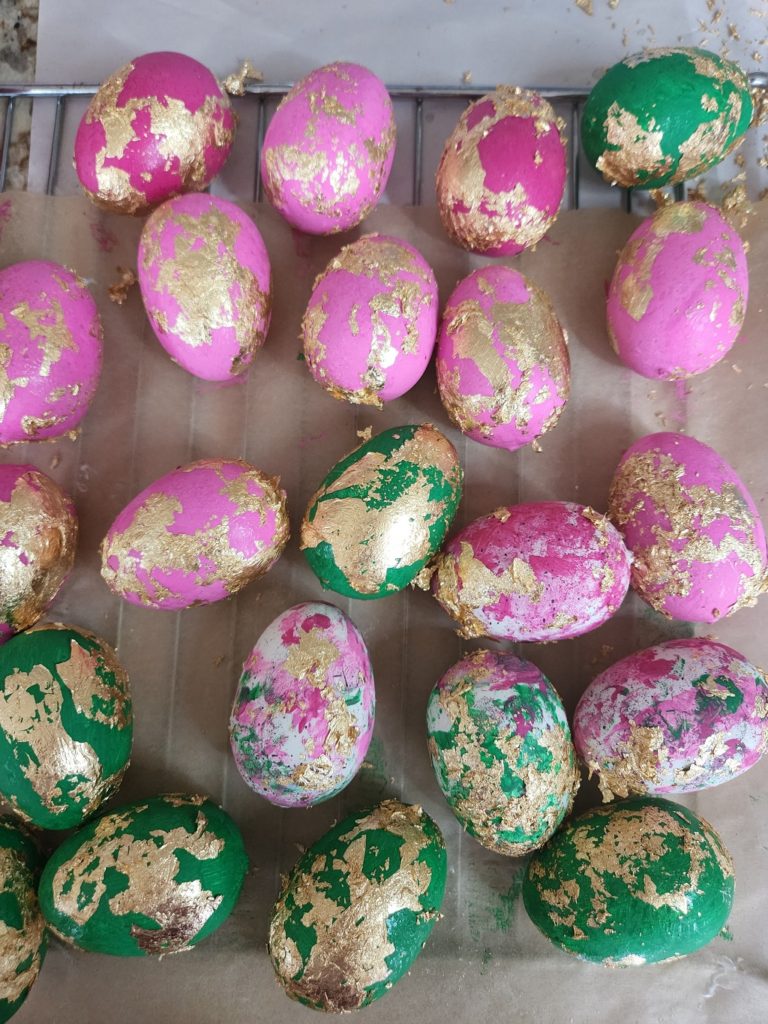
Lastly, I used my glue gun to attach the ribbon to each egg and tied them to my branches.
Making this Easter Egg Tree gave me such joy. It looks so pretty on my breakfast table, I’ll enjoy it each morning as we have our breakfast.
This Spring floral Arrangement is another way to welcome Spring!
Are you not feeling like making your own Easter Egg Tree? No worries, I’ve rounded up a few choices here for you.
I hope you are inspired by this post! For more daily inspiration follow me on Instagram and Pinterest.
-
Trader Joe’s Flowers What to Buy: Best Spring Guide
There is something that happens to me every single week without fail. I walk into Trader Joe’s with my list — olive oil, lemons, seafood blend — and without even meaning to my cart takes a hard left turn straight into the flower section. Every time. I cannot be stopped. If you’ve never lingered in…
-
Charcuterie Board Serving Size: The Perfect Guide
Long before anyone called it a charcuterie board, my family was making them. A platter of meats, cheeses, crackers, whatever looked good — it just appeared at every gathering without anyone thinking twice about it. We didn’t have a name for it. We just knew it disappeared fast. 😄 These days, the charcuterie board has…
-
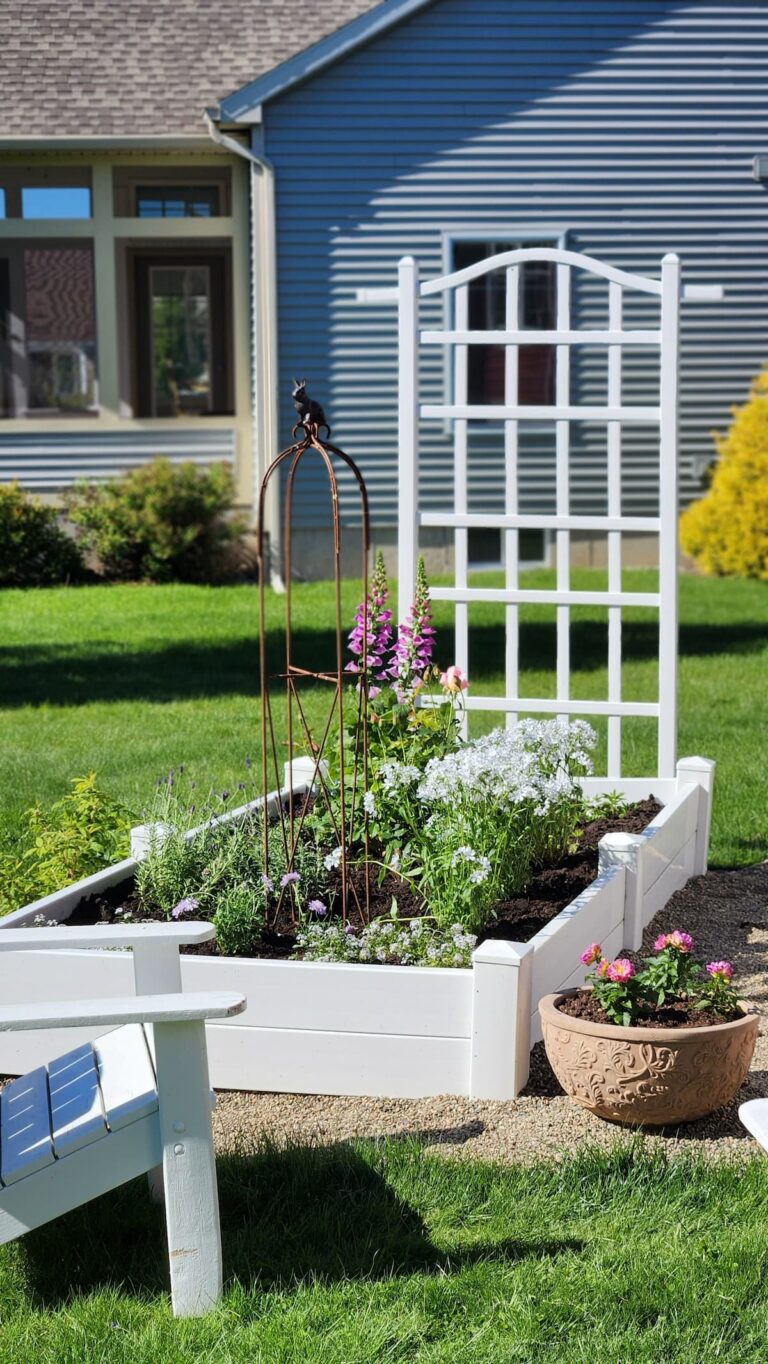
What to Plant in Spring Garden: Best Guide and Tips
There is something about this time of year that makes me want to throw open the back door, pull on my garden gloves, and just dig. You know that feeling? That restless, hopeful, let’s-make-something-beautiful energy that arrives right along with the first warm days? That’s exactly where I am right now — standing in my backyard…
-
Rambling from the Roost: Volume 23
The one where we escape to our favorite island, eat very well, and I share a few things you might have missed on the blog. Oh friend, pull up a chair. Pour yourself something cold — or hot, depending on where you live — because it’s time for another Rambling from the Roost. These little…
-
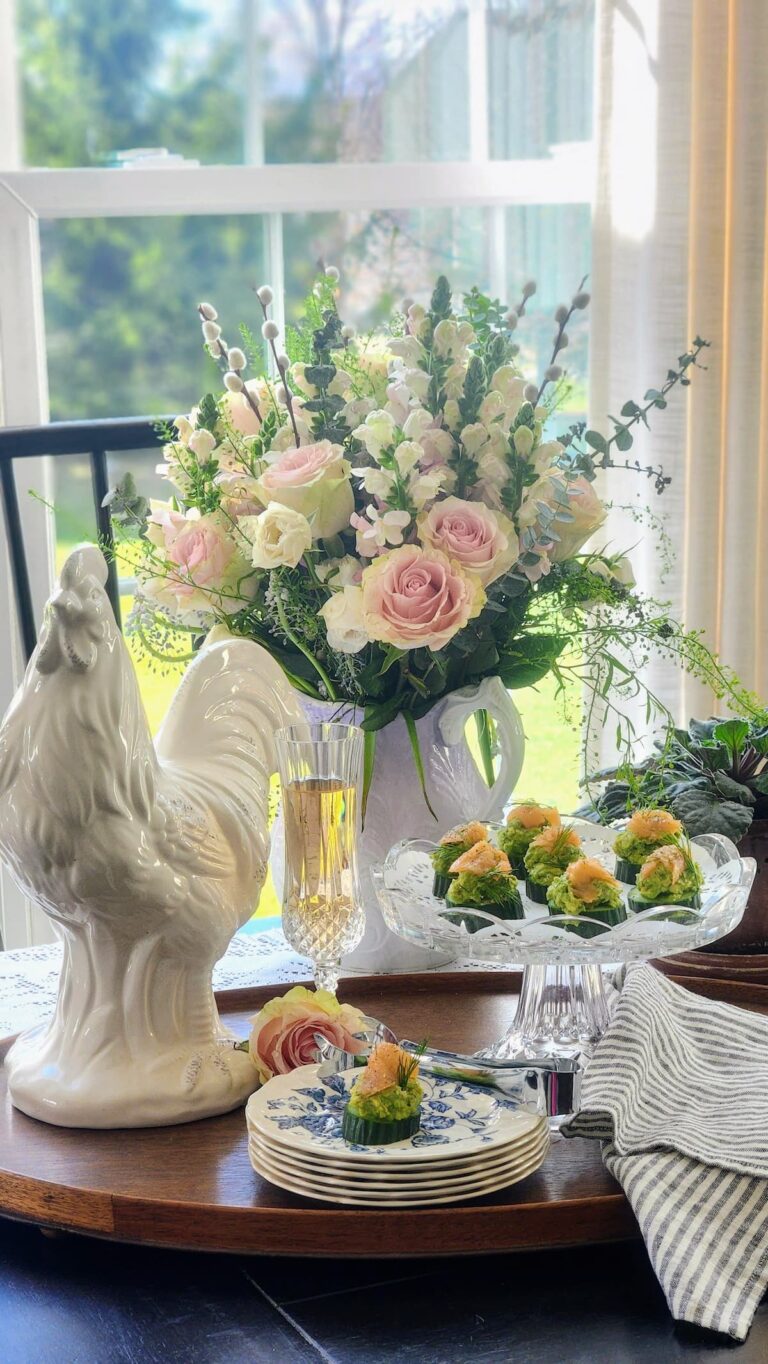
Easy Smoked Salmon Cucumber Bites Recipe: Party Appetizer
Light, fresh, and elegant enough for company — easy enough for a Wednesday night. Grazing is my thing. A little of this, a little of that — a bite here, a nibble there. There is something about a beautiful little platter that just makes an ordinary evening feel special. Andrew and I do this often…
-
How to Create a Winning Kentucky Derby Tablescape
The first Saturday in May has always felt like a little holiday in our house — the kind you make yourself. It begins with my Kentucky Derby tablescape tablecloth going down before breakfast and ends with candles burning long after the race is over. That is Derby Day at The Roost, and around here, it…


Adorable, Susan! I love the pink and green together. And, the gold makes it extra special! Thanks for your great ideas!