How to Create a Gallery Wall in Your Home
We all have them. An empty wall that is! The question is what do we do with them? Today I’m sharing with you How to Create a Gallery Wall in Your Home. Let’s get that empty wall you’ve been staring at, looking fabulous.
Do you have that wall in your home that just looks blank? I sure did.
I found that when I looked from my kitchen into the hallway, there was no depth for my eye to rest. What I mean by that is that sometimes a blank space has no visual ending to it. It has no interest.
Think about it this way. When you walk into a home your eye has the desire to gaze at decorated areas and find a place to pause, rest, and enjoy the visual artistry! A gallery wall does just that!
Time to Get Creative with that Empty Wall
After studying many photos and magazines, I wondered to myself, ‘have gallery walls gone out of style’?
The good news is they have not. Whether you have a modern style, farmhouse home, or a more traditional decorating favor, every home can have one. In fact, no home is complete without a great gallery wall.
Here is the part I love. Any room or empty wall can be the canvas for your artwork. Whether it is your bedroom wall, the living room, dining room, kitchen, or hallway. The possibilities are limitless.
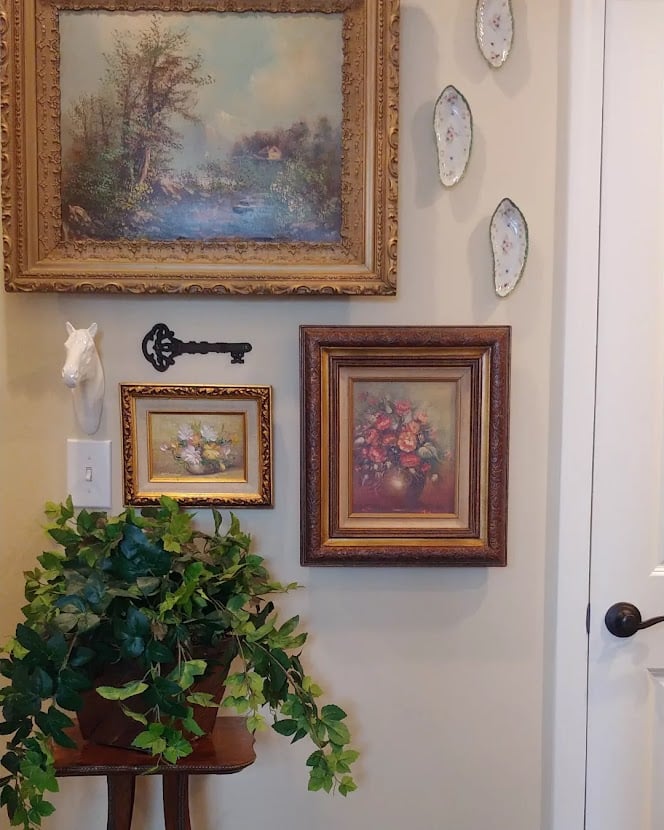
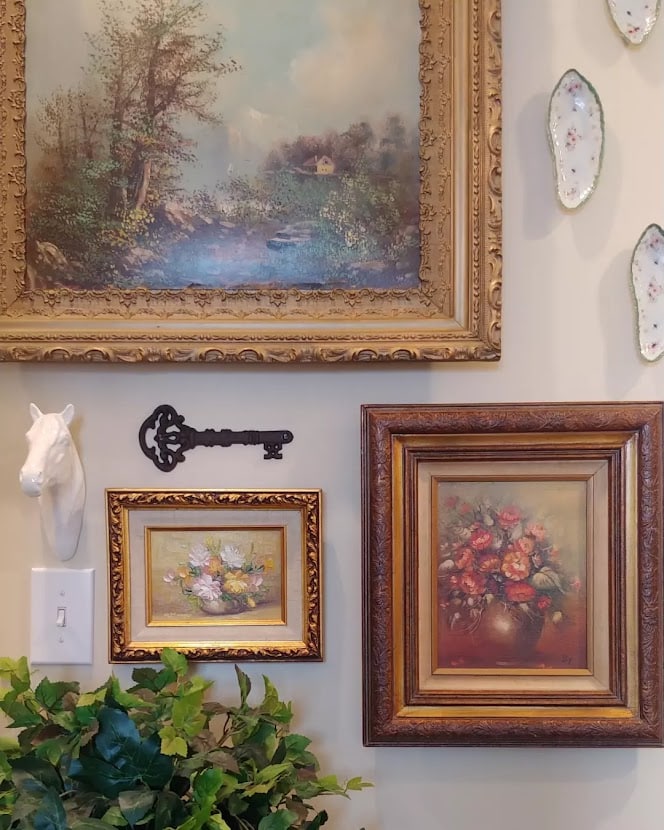
Let your creativity flow by using your favorite collection of plates, paintings, baskets, or pretty much anything you want to display.
Gallery walls are the perfect way to highlight what you collect and love.
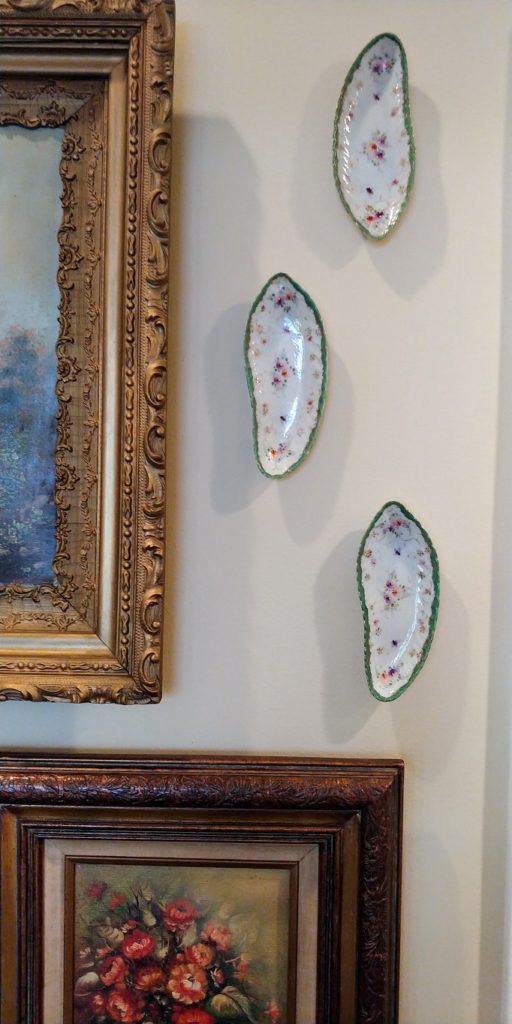
Being a dish collector, when I found these three bone plates I knew I would have to include them in my latest gallery wall.
Why store your pretty things in a drawer or closet? Hang them up!
All three plates are from a local thrift shop and cost me only $1.00. I used THESE to hang the plates.
8 Steps for Building A Gallery Wall
- The first step is to decide what room or empty wall you are going to be updating!
- Once you decide which wall you are going to fill, pull all of your items together. Typically I try to use at least four to six items.
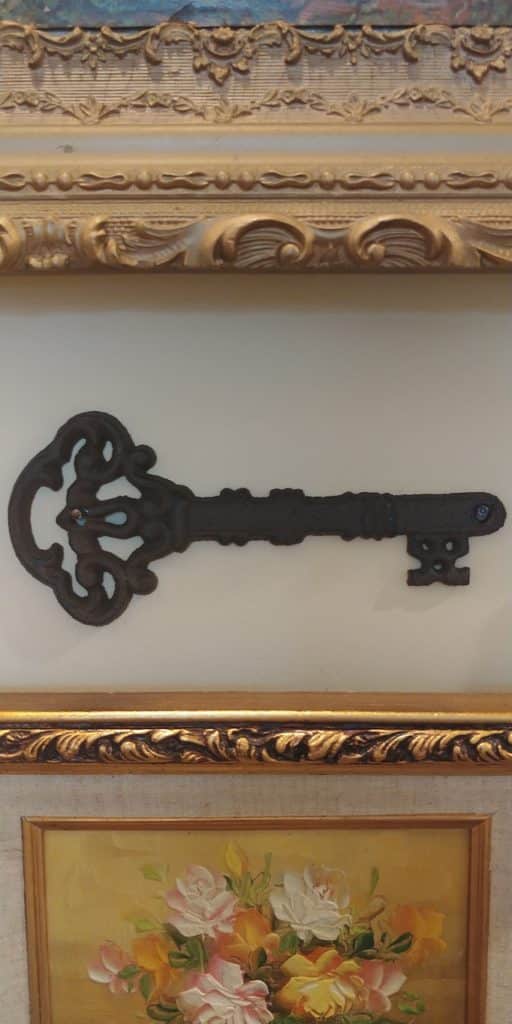
- Add depth by using ceramic pieces or wrought iron hangings
- Before you begin, lay all of your items on the floor or a table to create a visual template for how you would like them to be placed on your wall.
- Up next is to measure the first item, centering it. It can be centered between a doorway or over a sofa or chair.
- Once the first piece is up, start building from there.
- It’s helpful to measure and hang the next item, step back and see if the placement is pleasing. (2 to 3 inches apart for each item works best for me)
- Continue hanging all of your items until you are pleased with the look.
A gallery wall creates art with art!
Your basic-looking empty wall is on its way to being a creative vignette in your home!
Before I began, I used THIS to brighten up my vintage frame.
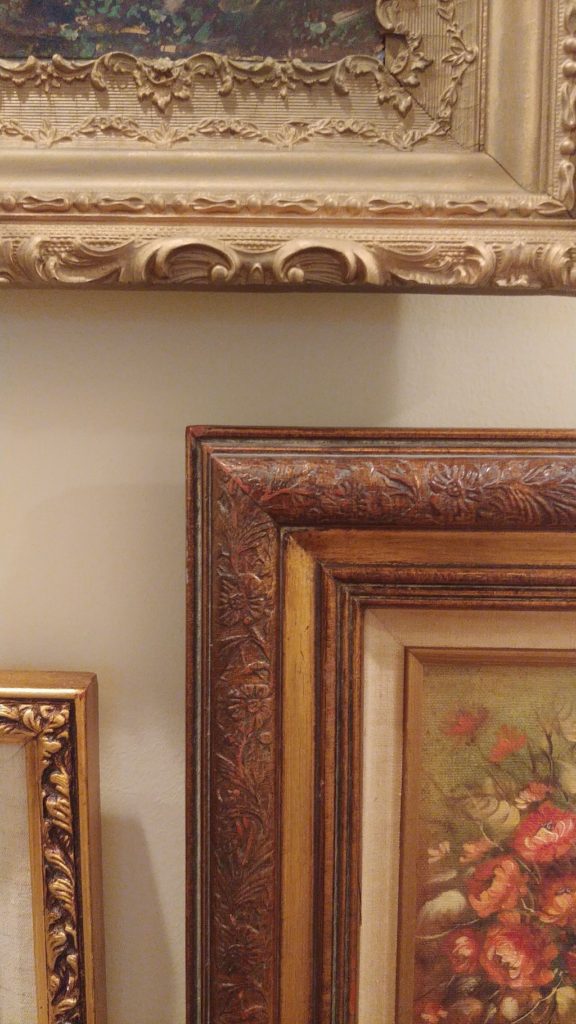
Each of the paintings I’ve used was thrifted! Shopping estate or garage sales are a great place to find artwork inexpensively.
I hope this post inspires you to go ahead and put a few holes in your wall. Once you get past that fear, (it’s a real fear I know) you will be on your way to creating a beautiful wall-scape for your home! No more empty walls here!
XO Susan
If this is your first visit here, this is how we met and Friday Finds and Friends got started.
Be sure to follow each of us, so you don’t miss anything!
You may also like this POST.

I love this idea. Thank you so much for linking up with Fabulous Friday Link Party! We sure appreciate you, Hugs and blessings to you.
Thank you Renae! It’s a great way to see other new blogs for sure!
Such great tips for a beautiful gallery wall! Thank you so much for sharing at Tuesday Turn About! Wishing you a wonderful weekend! xo
thank you Lynne!